
My $50 flea-market Dell with 7+ hours of video on one charge
Table of Contents
Taming an Inspiron 11 for travel
This is my travel laptop. It’s a Dell Inspiron 11 2-in-1 from 2015 that I bought at a flea market in Vietnam: it turned on, it cost very little, and now it goes everywhere with me. It’s a ten-year-old machine with a 6th gen i3 processor, the only test that mattered before buying it was “does it work?”, and it did.

What am I actually using it for, in priority order:
- Travel. Holidays, limousine1, planes. Something light that works a long time without having to rely on an outlet.
- Media playback. The main use case, the entire tuning project below is oriented around watching video for hours without hunting for a socket.
- Web browsing. The real number one use case, but optimization for browsing is a side effect of the work done above.
- Light coding sessions, sometimes, in passing, killing a few hours at a coffeeshop during holidays.
And here’s where all of that landed: the battery is damaged, and I still get more than 7 hours of playback on one charge. That was good enough to stop tweaking and write this down instead.
The machine
| Chassis | Dell Inspiron 11 2-in-1 (2016), 11.6″, 1366×768 eDP panel |
| CPU | Intel Core i3-6100U, dual-core Skylake @ 2.3 GHz |
| GPU | Intel HD Graphics 520 (Skylake GT2, i915 kernel driver) |
| RAM | 8 GiB DDR3 + zram/swap file |
| Storage | WD Green 240 GB SATA SSD |
The spec sheet above is a little different than the stock machine: it came with a spinning HDD and a single 4 GB stick of DDR3.
I replaced both.
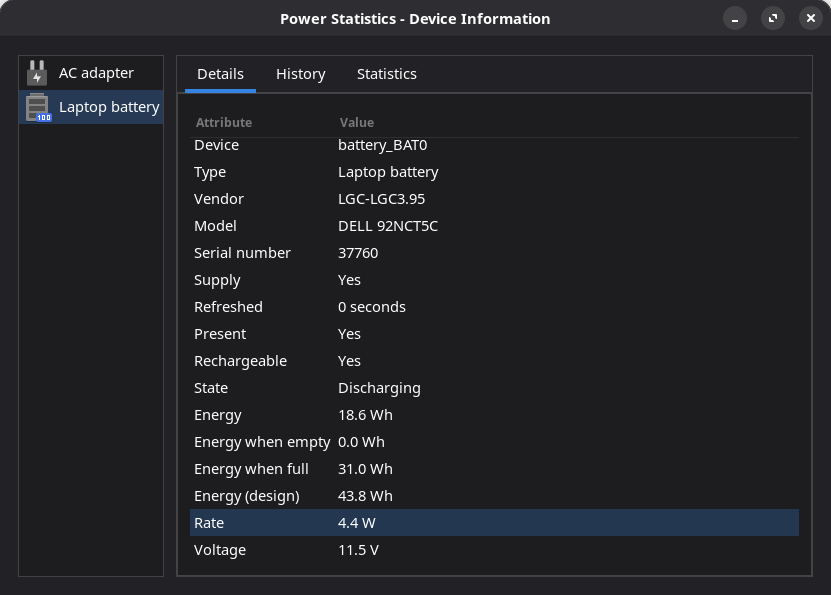
The battery’s designed maximum capacity is 43.8 Wh. It’s an old machine and, obviously, the battery now is damaged and upower shows something around 31 Wh (~70% of health). Fine. The goal of this laptop is to be able to be used for a long time off charge, so the math is simple: hours = Wh ÷ W, so every watt counts double.
Replacing some parts
The laptop initially came with a 500 GB spinning HDD. I haven’t SMART-tested it, but I’m pretty sure it was in bad health (at least as much as the battery), and I want a snappy machine. So I replaced it with a SSD I had around. It’s also great energy-wise: no disk to spin equal less electricity used.
I also upgraded the RAM. This laptop only has 1 SO-DIMM slot, and the CPU spec shows that it can handles a maximum of 8 GB of RAM. So I ordered a new Samsung DDR3L 8 GiB 1600 MHz stick and maxed it out the capacity for 140k VND (~$5).
Finally, the stock RTL8723BE WiFi card is 2.4 GHz only, limited band, poor performance. Funny story: the Hanoi’s international airport free wifi is 5 GHz, which my card couldn’t even see. So I swapped that old card with an Intel Dual Band Wireless-AC 7265 card from another dead laptop (my inxi now reports it via iwlwifi). It improved both Bluetooth and WiFi, added 5 GHz WiFi support, and is likely more energy efficient. So I also count that as an energy improvement.
Step zero: Linux
Before any tuning, there’s an order to things, and step one was leaving the old Windows 7 pre-installed entirely.
The reason is simple: I don’t like Windows, I don’t want to travel with an outdated (abandonned?) system, and all the optimizations in this article (CPU C-states, GPU sleep states in sysfs, TLP, thermald, powertop) are Linux-side controls. I’ve tried to write this article as a kind of tutorial, so everything below assumes you’re on Linux.
The distro hopping
Linux is the kernel and is shipped in a distribution (distro). So I had to pick one.
- EndeavourOS, my main OS for +5 years, Arch-based. But Arch Linux needs regular updates to stay healthy (it’s a rolling release Linux distribution), and a travel laptop can sit untouched for weeks between trips. Rolling release is a bad fit for it.
- MX Linux, I listened to the internet crowd that recommends “distros focused on old laptops” and gave it a try. It was fine. It wasn’t useful either, and, since I wasn’t using any of their tools, I replaced it.
- Debian, the obvious choice, and where I ended up: stable, boring in the best sense, no update treadmill while traveling. This is what runs on the machine today.
The desktop hopping
The distro is just the base, and I still had to pick a desktop environment (DE for short) (the graphical interface of the OS). My criteria: get something super lightweight (resources wise) to get the best battery, and comfortable on a small screen (11 inches at 720p).
Those criteria match pretty well the tiling window manager target. I had some experience with i3 back in the day, so I’m not lost in the UX or in the ton of small configuration files. So I tried the new cool kids in that category.
The issue with tiling (on top of having windows either too big or too small, but never the right size), is that it’s not that great to use if the keyboard isn’t great. And this 10-year-old machine was never super great keyboard-wise (never super great in general?). So the experience wasn’t as good as I expected.
[Tiling environment] | [Classic x11 environment]
One general lesson came out from tuning those DEs (obvious but good to note): compositor effects keep your iGPU awake. Disabling animations, shadows, transparency, etc; and letting the compositor stop redrawing when nothing changes was a real, watt-level, win.
There’s a lot of interesting stuff to discuss about Wayland compositor details, but I’m not going into it in this article. On this machine, it didn’t have much of an impact and the DE I tried after are not using it yet.
So I moved to more traditional lightweight DEs. In order of testing then rejection:
- XFCE, light enough, but a little too rough for me after a few weeks of use (no system-wide dark theme, couldn’t make it really pretty).
- Cinnamon, comfortable, but ~1 GiB of RAM just for the shell on an 8 GiB machine shows up as swap writeback more than it does in watts. Also it was CPU-heavier and was taking some long time to comeback from sleep.
- GNOME, I use it on my main laptop, but no: too heavy for this one, and the UI is simply too large for a small 11″ 720p display.
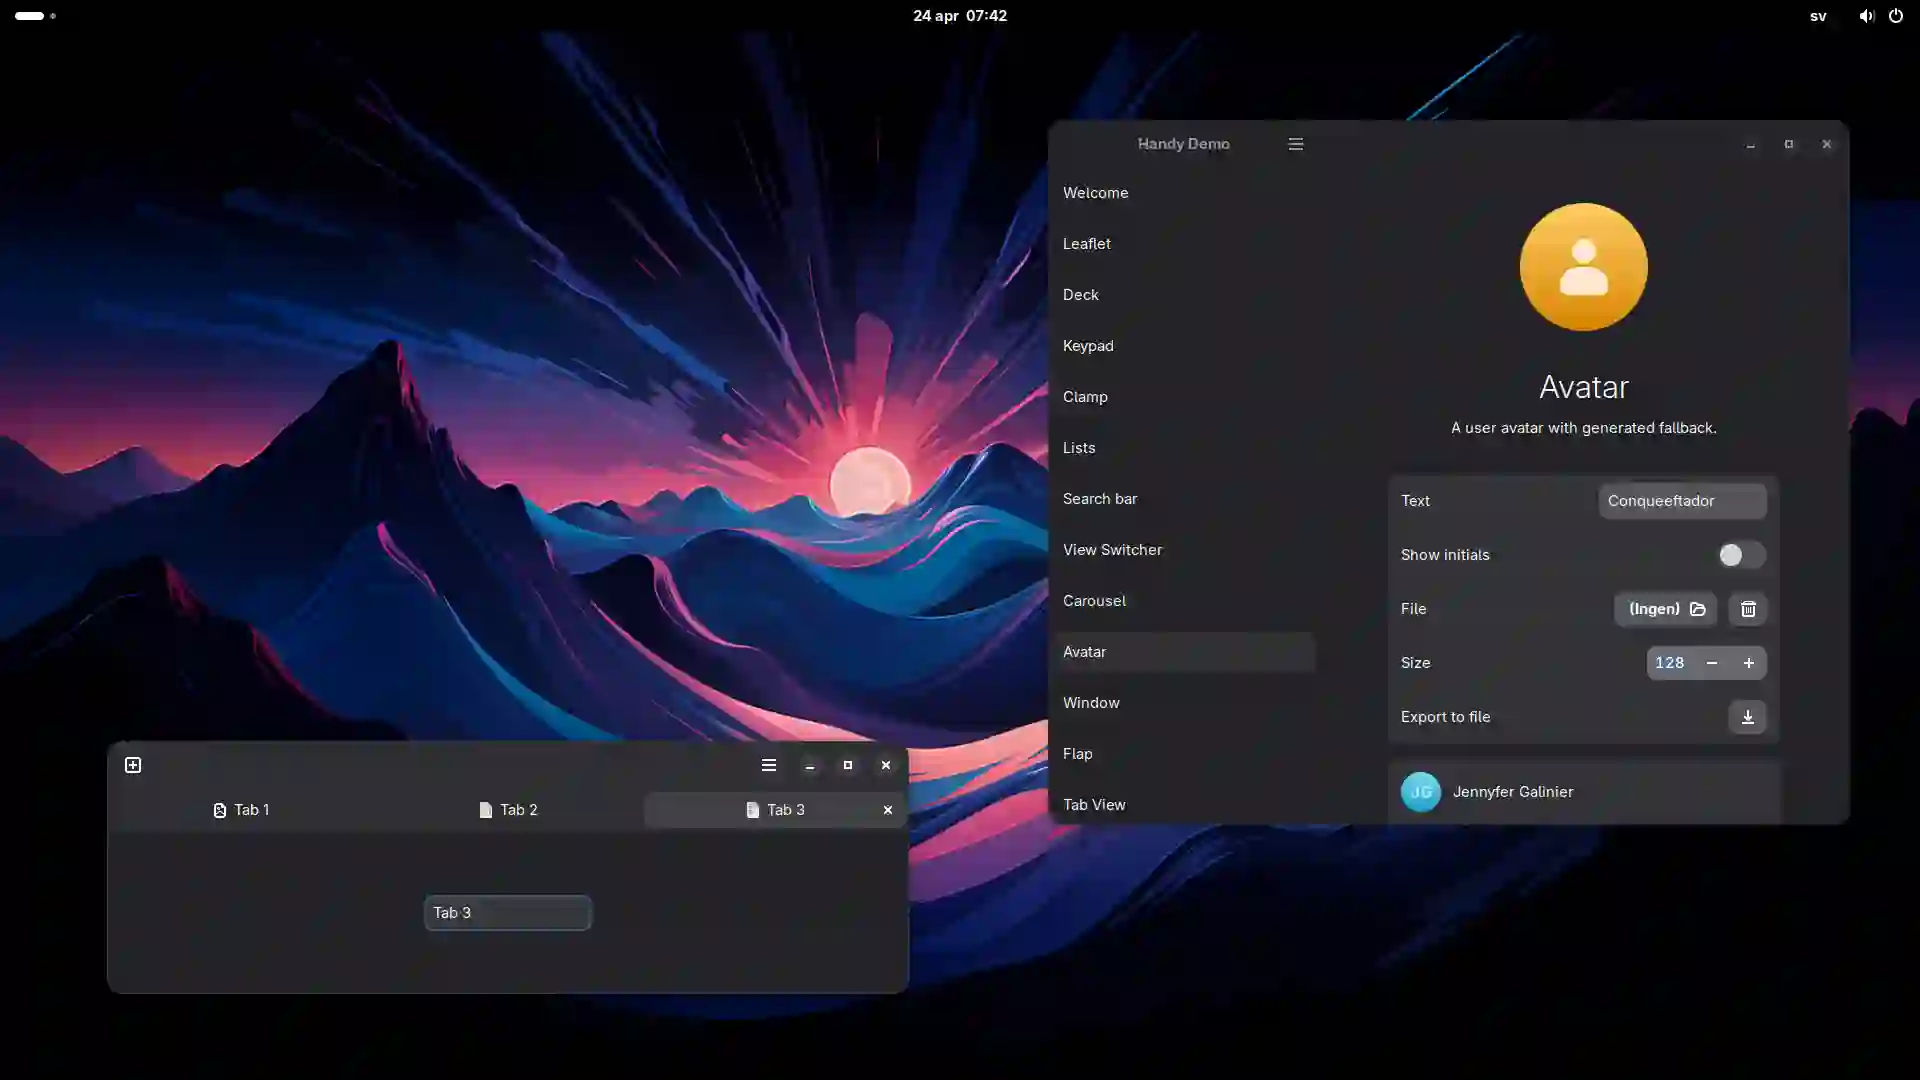
- Budgie, kind of in-between XFCE and GNOME. It’s pretty enough out of the box and uses as much resources as XFCE (ie. not much). Verdict after living with it: I surprisingly really like it!
Budgie’s default GTK theme looks a bit dated. I use adw-gtk3 to get a GNOME-style modern look without the GNOME weight. Install it, set it as the GTK theme in Budgie’s appearance settings, and it immediately felt better to me.
The power stack
This is the part you can reproduce. Plain Debian + standard tooling, nothing distro-magic. Order matters: kernel parameters first, then GPU, then daemons, then the browser.
[0.] Install Debian with Budgie
Debian doesn’t propose Budgie in its installer, so you install Debian without any GUI then install the desktop environment (one package which pulls everything as dependencies):
apt install -y budgie-desktop-environment
reboot
And now you’ll be greeted with Budgie’s GUI !
[1.] Kernel boot parameters (CPU side)
First step, making the kernel more friendly with the CPU and configuring it to use the hardware as efficiently as possible. To do so, we need to add those parameters in /etc/default/grub:
GRUB_CMDLINE_LINUX_DEFAULT="intel_pstate=enable processor.max_cstate=6 intel_idle.max_cstate=6"Then sudo update-grub and sudo reboot to apply them.
- Debian comes with GRUB and not systemd-boot, so configuration is in GRUB.
- Your
GRUB_CMDLINE_LINUX_DEFAULTmight already have some options (likequiet), just add those new parameters in the existing string.
What each one does:
intel_pstate=enable, switches CPU frequency scaling to Intel’s P-state driver instead of the generic ACPI path. It lets the hardware manage frequencies in-band, which means much better idle behavior than the old driver on this generation.- To verify it’s actually active, run
cat /sys/devices/system/cpu/cpu0/cpufreq/scaling_driverand it should printintel_pstate
- To verify it’s actually active, run
processor.max_cstate=6andintel_idle.max_cstate=6, C-states are CPU sleep depths; deeper states save more idle power at the cost of longer wake latency. Pinning both to 6 makes sure cores actually go deep when idle instead of hovering in shallow states.
[2.] i915.conf (GPU side), this is where media playback lives
On this machine, all video decoding happens on the HD 520. It’s weak, it’s 15W TDP, it needs to be used efficiently: both not using it when nothing is happening, and using it well (hardware acceleration) when decoding video.
So the question for battery life isn’t “how fast does it decode?” but “does it actually sleep when a frame doesn’t need rendering?”. By default, the i915 driver often doesn’t.
Let’s tune it properly in /etc/modprobe.d/i915.conf:
options i915 enable_rc6=1
options i915 enable_fbc=1
options i915 enable_psr=1enable_rc6=1, RC6 is the GPU’s deep idle state. When nothing is being rendered, the 3D engine powers down instead of idling awake. This did most of the heavy lifting on my machine, the iGPU was simply staying up for no reason before.enable_fbc=1, framebuffer compression. If the screen content doesn’t change (a paused video, a static page), the display reads from compressed memory instead of forcing full-bandwidth refreshes: less RAM traffic, less iGPU work, less power.enable_psr=1, panel self-refresh: the display controller keeps showing the last frame itself while nothing changes, so the GPU doesn’t re-send it at all. Caveat: PSR is panel-dependent and can cause flickering on some panels (mine survived it; if yours doesn’t, try PSR2, or drop this line entirely).
[3.] thermald
As it’s a travel laptop, having good battery is great, but having a laptop not burning me is even better. Good thermal also helps power: no fan = more battery, etc.
To do so, I install thermald :
sudo apt install -y thermald && sudo systemctl enable --now thermald
# Check that it's running
systemctl status thermald
thermald is Intel’s thermal daemon: it reads the CPU/GPU thermal sensors and adjusts cooling policy before you hit hard throttling. On sustained video decode that matters. Without a proper thermal policy, the GPU oscillates between “too hot” and “thermal throttle”, which is both noisier and less efficient than staying in a stable state.
[4.] TLP instead of power-profiles-daemon
Debian uses power-profiles-daemon (PPD) by default. PPD is built for modern hardware: it exposes three coarse profiles (balanced / power-saver / performance) that the user has to manually manage, and hands the rest to the kernel. I read that, on older Intel, that’s not enough surface area; but mainly, that’s not really interesting to me as I would leave it on power-saving all the time anyway.
So I replaced it with TLP which is “a feature-rich Linux utility designed to save laptop battery power”2.
One thing worth knowing about TLP: it has no auto-tune mode, so it needs to be configured manually. But its defaults already implement powertop’s recommendations out of the box (so “install and leave it” is a legitimate baseline), and it supports per-machine drop-in configs in /etc/tlp.d/.
sudo apt install tlp tlp-rdw
sudo systemctl enable --now tlp
tlp-stat -s   # sanity check
PPD and TLP are conflicting packages, so installing TLP will automatically remove the pre-installed PPD package.
My drop-in for this machine, /etc/tlp.d/01-skylake-dell.conf:
# CPU
CPU_SCALING_GOVERNOR_ON_AC=powersave
CPU_SCALING_GOVERNOR_ON_BAT=powersave
CPU_MAX_PERF_ON_AC=100
CPU_MAX_PERF_ON_BAT=50
CPU_MIN_PERF_ON_AC=5
CPU_MIN_PERF_ON_BAT=5
CPU_BOOST_ON_AC=1
# Disabling would improve battery, but it really impacts experience
# CPU_BOOST_ON_BAT=0
CPU_ENERGY_PERF_POLICY_ON_AC=balance_performance
CPU_ENERGY_PERF_POLICY_ON_BAT=power

# Intel GPU
INTEL_GPU_MIN_FREQ_ON_AC=350
INTEL_GPU_MIN_FREQ_ON_BAT=350
INTEL_GPU_MAX_FREQ_ON_AC=1000
INTEL_GPU_MAX_FREQ_ON_BAT=650
INTEL_GPU_BOOST_FREQ_ON_AC=1000
INTEL_GPU_BOOST_FREQ_ON_BAT=650

# SSD -- no spindown, SSDs don't spin
DISK_APM_LEVEL_ON_AC="254 254"
DISK_APM_LEVEL_ON_BAT="254 254"
DISK_SPINDOWN_TIMEOUT_ON_AC="0 0"
DISK_SPINDOWN_TIMEOUT_ON_BAT="0 0"

# WiFi power saving
WIFI_PWR_ON_AC=off
# Disabling would improve battery, but it really impacts experience
# WIFI_PWR_ON_BAT=on

# USB autosuspend
USB_AUTOSUSPEND=1
[5.] Screen brightness
Before talking about the softwares: screen brightness is the single most impactful variable on this machine. The 11.6″ 1366×768 panel draws somewhere between 0.8 W and 2.5 W depending on brightness, which on a 31 Wh battery quickly adds up. At full brightness that’s 10–12% of my energy budget.
Unfortunalty, there’s no configuration I can use to optimize this power consumption, I should just be careful to not have my screen uselessly too bright if I want to keep good battery life.
[6.] Firefox, tuning for streaming
Every power snapshot I took showed the same #1 consumer: Firefox. All the settings below go in about:config setting page: accept the warning, then search for each key in the top bar and change the values accordingly.
The list is quite long.So feel free to extend it if you're interested, or skip it :)
Hardware acceleration and graphics
This is the core of it. On the HD 520, hardware video decode versus software decode is a 2~3× difference in CPU load on a single 720p stream:
media.ffmpeg.vaapi.enabled = true
media.hardware-video-decoding.enabled = true
media.hardware-video-decoding.force-enabled = true
These three enable VA-API hardware decode; without them, every video plays entirely on the CPU.
After enabling them, verify in about:support that Hardware Video Decoding shows “available” and Compositing is not “Basic”.
media.av1.enabled = falseYouTube increasingly serves AV1 by default (and it’s great, open-source format, better performance, etc), and AV1 decode is software-only on the HD 520 (bad). Disabling it forces fallback to VP9 or H.264, both of which the iGPU decodes in hardware (cf. point above). So we disable it.
gfx.webrender.all = falseWebRender increases power draw on this GPU generation; disabling it lets the i915 driver use its own compositing path, which behaves better on Skylake. If you’re on newer Intel (Tiger Lake and up), skip this one. Check about:support afterwards: if Compositing reads “Basic”, WebRender was your only working GPU compositor and this line is costing more than it saves.
Not what it sounds like in current Firefox: this does not turn WebRender off. about:support still reports Compositing as “WebRender” afterwards, which I’ve verified on this machine. It switches WebRender to a different rendering path, the i915 driver’s default, and that’s where the power saving comes from on the HD 520. If you’re on newer Intel (Tiger Lake and up), skip it, that path is an old-driver thing.
layers.acceleration.disabled = false
layers.omtp.enabled = true
Keep GPU compositing on. And enabling omtp to offload painting to a separate thread, which smooths out the compositor without increasing draw calls.
Power and background activity
browser.tabs.remote.warmup.enabled = falseFirefox pre-warms content processes for tabs you haven’t opened yet. On a dual-core machine with limited RAM that’s wasted overhead; if you’d rather keep it, browser.tabs.remote.warmup.maxTabs = 1 limits how many get warmed.
layout.frame_rate = 30Caps the browser’s render rate at 30 fps. On a 60 Hz panel that cuts compositor work roughly in half during scrolling and animations; pages still feel fine, and you’d only notice the cap on something heavier than a news article. (Known quirk: an open bug has this pref ignored when privacy.resistFingerprinting is active).
Memory management
browser.cache.disk.enable = false
browser.cache.memory.enable = true
browser.cache.memory.capacity = 51200
browser.cache.memory.max_entry_size = 5120
Disabling the disk cache in favor of a fixed ~50 MB memory cache trades some I/O for RAM. On an SSD the speed difference is small, but it removes the periodic cache-write stalls that can show up as brief freezes on lighter hardware.
browser.tabs.unloadOnLowMemory = true
dom.ipc.processCount = 4
unloadOnLowMemory lets Firefox discard background tabs from RAM under pressure instead of letting you hit swap (it skips anything playing media or in Picture-in-Picture). dom.ipc.processCount = 4 caps content processes; the default scales with core count and creates more than a dual-core machine benefits from.
AI features, telemetry, prefetching
Recent Firefox versions ship background ML features that run local inference: the sidebar chat, smart tab grouping, link previews. None of them are useful for me on this travel machine:
browser.ml.chat.enabled = false
browser.tabs.groups.smart.enabled = false
browser.urlbar.suggest.addons = false
In the settings UI as well: Settings → Privacy & Security → Firefox Data Collection and Use, turn everything off. It won’t move the power needle, but it cuts background network activity.
And stop speculative networking entirely:
network.dns.disablePrefetch = true
network.prefetch-next = false
network.predictor.enabled = false
By default Firefox resolves DNS ahead of time and prefetches links it guesses you’ll click. On a travel machine with limited WiFi those requests are pure waste, and each one is another radio wake-up to work around in power saving mode.
Addons
Three addons that compound the about:config work:
- uBlock Origin: blocks ads and trackers. Fewer network requests, less DOM to render, lower CPU load across every page you visit.
- YouTube High Definition: set YouTube preferred resolution to 720p. The screen is 1366×768, so anything above that is purely waste work (default setting of the addon is “highest quality possible”, which is the opposite of what we want here).
- Auto Tab Discard: suspends background tabs after a timeout, but keep some QoL like saving the playtime position on Youtube, not discarding tabs with forms filled, etc.
[-1.] What I did not do: Undervolting
Skylake in principle supports it via intel-undervolt (unlike my Intel NUC, which Intel locked after Plundervolt).
But, because of my good habit of updating everything, this laptop’s latest BIOS version locks the voltage MSRs. When I applied a core offset and read the MSR back with rdmsr, the value hadn’t changed, the write never stuck. No experimentation there possible…
The numbers
- YouTube playback at stock defaults: 10~15 W. That’s the baseline to beat for “watching video on an old laptop.”
- After the full stack (kernel params + i915.conf + thermald + TLP + Firefox tuning):
- Idle in power-saver mode drops from the ~5 W region to under 3.5 W;
- Web browsing (light load): ~5.5 W (deep sleep S3 active, powersave governor everywhere);
- Watching YouTube is around 7~9 W.
I also did some A/B-testing over the DEs under identical load: XFCE, Cinnamon, and Budgie all came within ~0.3 W of each other (within my measurement noise). Expected, since they share mostly identical libraries, but it confirms the shell is not a meaningful power-saving lever.
Bref
This is how a decade-old slow laptop can become a great machine with 7+ hours of video playback. Not as good as it could be (tiling was better battery-wise, I could tune some settings more aggressively to save more battery but it would impact my experience), but this laptop now does its job, which was the actual goal all along.
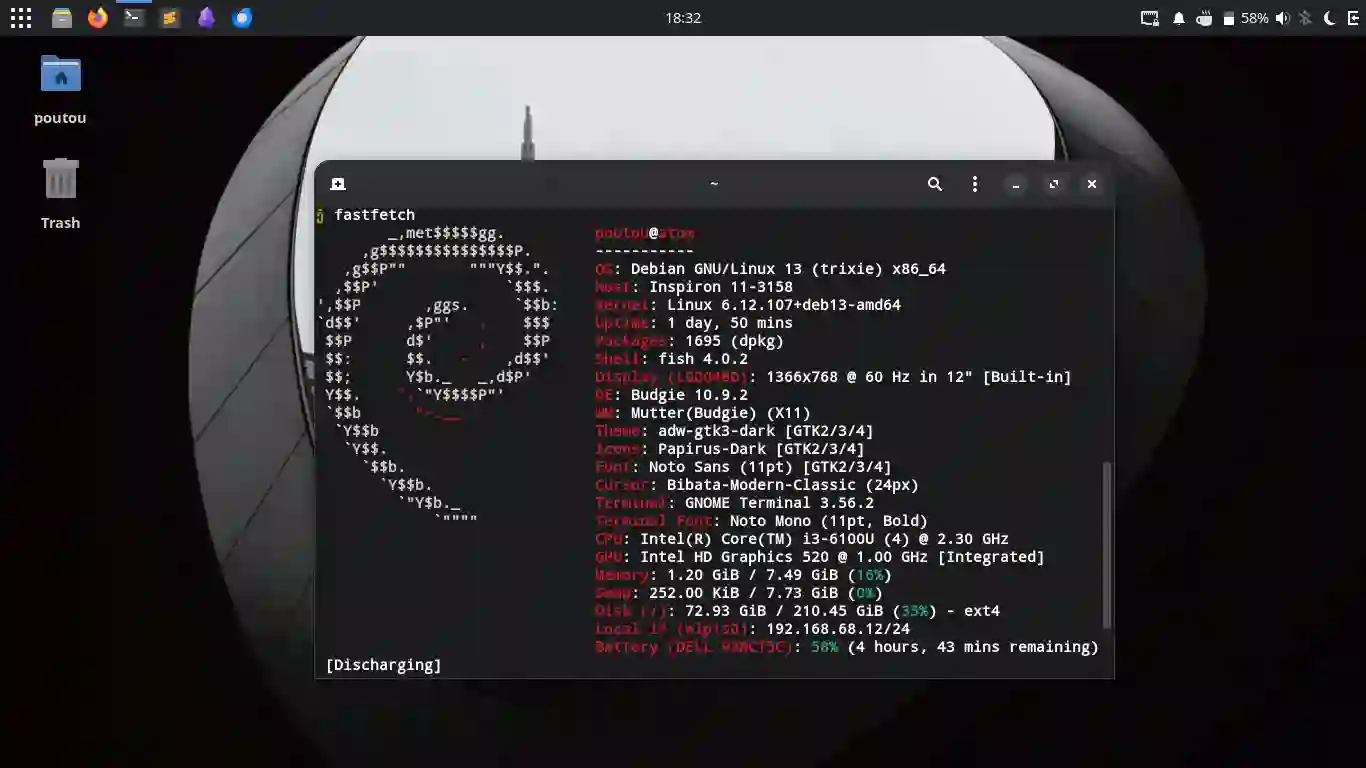
I now have a snappy, cheap (probably $40~50 total), small and lightweight machine (both to carry and resource wise) that I carry on for holidays to watch movies and stuff 😁
Footnotes
-
In Vietnam, what is called “limousine” is more of a small bus, quite common for travel between cities. I’m not rich enough to move with real limousines. ↩